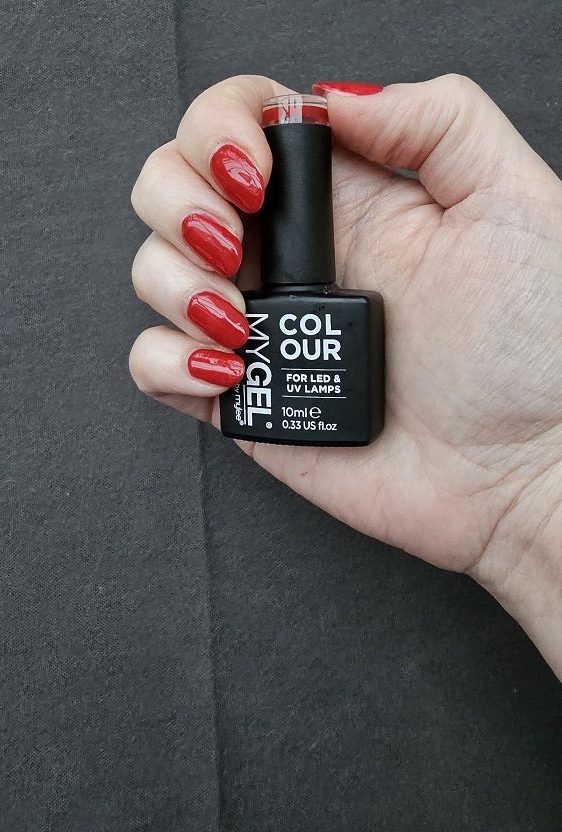
There’s nothing quite like the timeless elegance of a classic red manicure. Achieving salon-quality results at home is easier than you might think, especially when using high-quality products like Mylee. In this guide, I’ll walk you through the step-by-step process to create a stunning classic red manicure using Mylee’s ‘As Red As It Gets‘ nail colour. Whether you’re a beginner or an experienced DIY enthusiast, these steps will help you achieve professional-looking results without leaving the comfort of your home.
*Post contains some affiliate links where I may earn a small percentage from any Mylee sales, at no extra cost to you
What You’ll Need
- Mylee Gel Nail Polish in ‘As Red As It Gets’
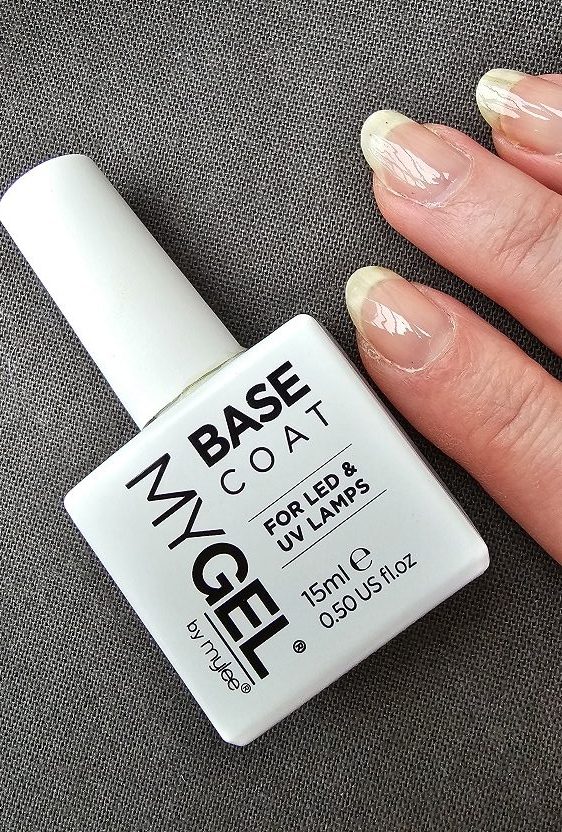
- Mylee Gel Base Coat
- Mylee Gel Top Coat
- Mylee Gel Nail Lamp
- Nail file and buffer
- Nail polish remover
- Cuticle pusher and/or trimmer
- Lint-free wipes
- Hand moisturiser
Step-by-Step Guide
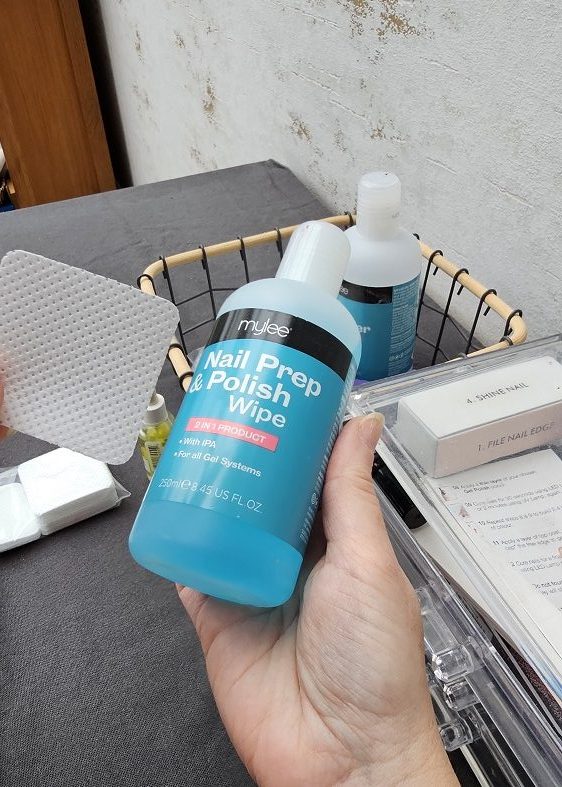
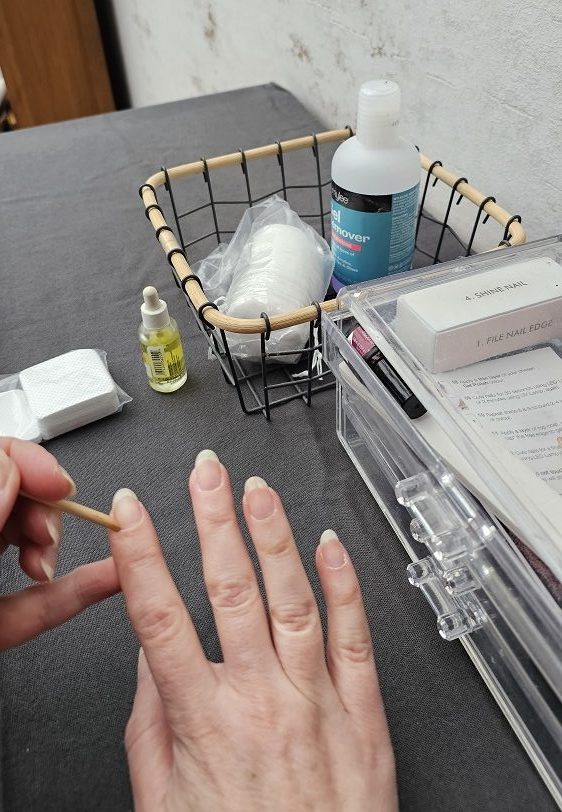
Prepare Your Nails: Start by removing any old polish using nail polish remover. Shape your nails using a file and gently buff the surface to remove any ridges. Push back or trim your cuticles for a clean nail bed. You don’t want anything on your nail that’s going to make the polish lift off. Wipe and rub your nails with a lint free wipe and some Nail Prep & Polish – this will cleanse and prepare your nail surface ready for the gel application
Apply Base Coat: Apply a thin layer of Mylee Gel Base Coat to each nail, making sure to cap the free edge. This will help the color adhere better and protect your natural nails. Cure under the Mylee Gel Lamp according to the instructions.
Apply the Red Gel Polish: Shake the ‘As Red As It Gets’ nail colour well before use. Apply a thin, even layer of the red gel polish to your nails. Be careful not to get the polish on your skin. Cure each coat under the Mylee Gel Lamp for the recommended time (usually 30-60 seconds per coat, but check the product instructions for precise timing).
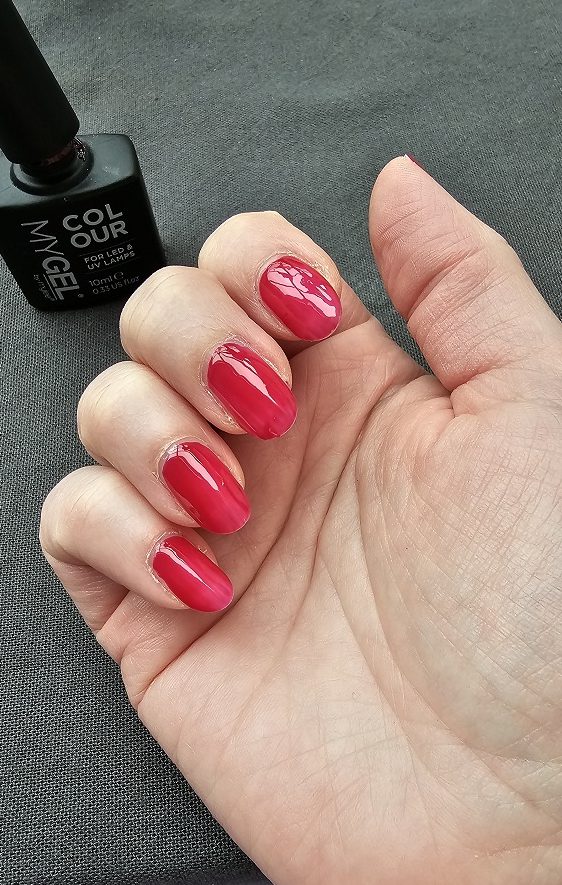
- First coat is quite translucent
- Add Additional Coats (if needed): Apply a second layer of the red gel polish if you prefer a more intense colour. Ensure each layer is cured properly under the nail lamp. You can then do a third coat if you wish – I like to do this for full intensity and coverage.
- Apply Top Coat: Once you’re satisfied with the colour, apply a thin layer of Mylee Gel Top Coat to seal in the colour and add shine to your nails. Remember to cap the free edge to prevent chipping. Cure the top coat under the lamp. If you use Mylee’s no wipe top coat, this means you won’t need to wipe off the sticky residue on the surface of your nails that normally comes about after you have done your final cure under the lamp.
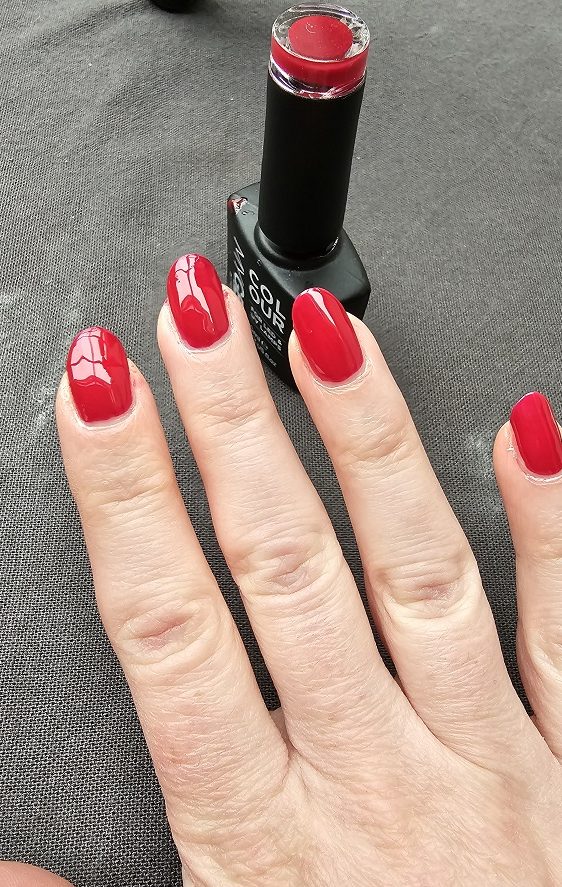
- Second coat is more intense
- Clean Up: Use a lint-free wipe and some nail polish remover to clean any excess polish from your skin and cuticles, ensuring a neat finish around the nails.
- Moisturise: Finish by moisturising your hands and cuticles with a nourishing hand cream or oil. I like to add a drop of cuticle oil to each nail bed and massage in.
- Cure Your Nails: Once the top coat is cured, your nails are done! Enjoy your salon-quality classic red manicure that you’ve achieved right at home.
Tips:
- There are some great complete nail kits at Mylee with everything you need to start doing your home manicures for the price of two or three professional manicures!
- Work in thin layers to ensure even application and quicker curing. Don’t worry about painting on the colour (I find the advantage of gel polish is that because it doesn’t set until cured, you have more time to work your brush on the nail until you are happy with the application, without it starting to set and drag as with a conventional nail polish).
- Avoid getting the gel polish on your skin to prevent lifting or peeling.
- Always follow the recommended curing times for each layer under the gel lamp.
- If you’re unsure about a step, refer to the instructions provided with the Mylee products.